Best Settings to Upload to Youtube Premier Pro Art Video
Premiere Pro Export Settings: How to Export MP4 Video for YouTube

Mar 31, 2022• Proven solutions
Exporting MP4 videos for YouTube with the right settings and aspect ratio is very important. Correct now, YouTube is the all-time social media platform for multimedia content producers at various levels of practice, and if y'all don't already have a YouTube channel, you lot're probably thinking of starting one. With software like Adobe Premiere Pro and Wondershare's FilmoraPro, you lot can export your MP4 videos in the best quality possible for YouTube.
In the steps below, we prove you the best settings for exporting MP4 videos in Premiere Pro and FilmoraPro.
- Office 1: YouTube video specification
- Part 2: How to export MP4 videos in Premiere Pro
- Part 3: How to export MP4 videos in FilmoraPro
Function 1: YouTube video specification
Before you export video to YouTube, it would be meliorate to know YouTube video specification. YouTube's aspect ratio is 16:9 and 1920x1080p (Full HD resolution) is the ideal dimension for YouTube videos. While you could get every bit high as 4k (3840x2160p), many professionals discover 1080p is enough for skillful quality MP4 YouTube videos.
The 128GB file size limit for YouTube is okay for nigh high-quality video uploads. Do note that the settings you choose for rendering videos in Premiere Pro or FilmoraPro could result in significantly large files.
Also bear in mind that it is all-time to edit and export your video in its original video resolution and frame rate. So basically, your video resolution and framerate should be the same while shooting, editing and exporting your video.
Part 2: How to export MP4 videos in Premiere Pro
Adobe Premiere Pro is a state-of-the-art multimedia editing software. While information technology has options for many complex settings for video exports, it does have presets for exporting videos for YouTube. If yous choose not to apply the built in YouTube video export preset, simply follow the steps below to export a high quality MP4 video for YouTube.
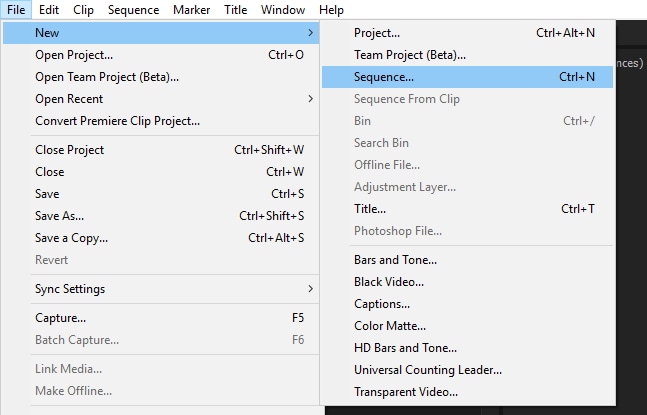
Step one: In-out option
Create a new sequence preset by clicking on FILE > NEW > SEQUENCE. Select the selection which best matches the resolution and framerate of your original video. Give the sequence preset a new name and save. With a new sequence preset created, a timeline window volition open up. Place your video project into the timeline.
Set the IN and OUT points to tell Premiere Pro where you want the rendering to begin and where you want it to cease. Move the playhead to where you desire the rendered video to showtime and press 'I' on your keyboard. So, motility the playhead to where you desire the rendered video to end and press 'O' on your keyboard.
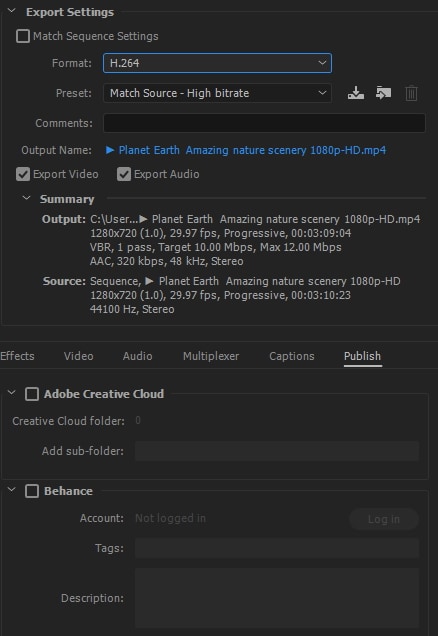
Step 2: Change consign settings
Next, click FILE > Export > MEDIA to open the Consign SETTINGS window. The of import things to focus on here are the VIDEO and Sound tabs. Above these tabs however, in that location are some important boxes to cheque:
- Fix FORMAT to H.264
- Gear up PRESET to CUSTOM
- Set OUTPUT Proper name to proper noun your video and cull where it volition be saved.
- Check boxes for Consign VIDEO and Consign Audio
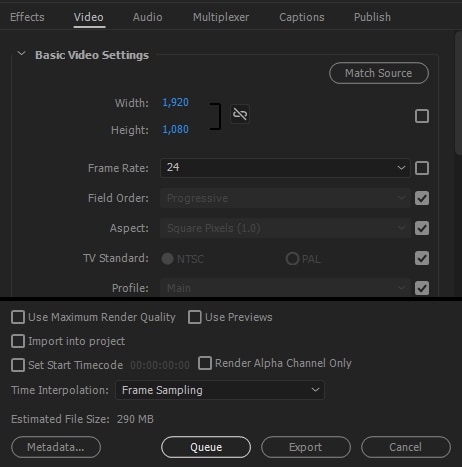
Step 3: Bones video/sound settings
Under BASIC VIDEO SETTINGS in the VIDEO tab, cull the following options:
- Set width and peak to 1920 and 1080 respectively
- Set framerate at 24fps or 23.976fps as the case may be
- Go along aspect ratio at SQUARE PIXELS one.0
- Prepare PROFILE to High
- Set LEVEL to 4.2
- Check box for 'Return AT MAXIMUM DEPTH'
- Prepare BITRADE ENCODING to VBR two PASS. Likewise set target bitrate to 8 or 16mbps to go along file reasonably small. Yous can as well gear up maximum bitrate to as high as 40mbps.
In the Audio TAB, choose the following options:
- Fix Audio CODEC to AAC
- Set AUDIO SAMPLE Charge per unit to 48000HZ
- Set CHANNELS to STEREO
- Set QUALITY to HIGH
- Gear up BITRATE to 320kbps
- Set PRECEDENCE to BITRATE
Step 4: Publish video to YouTube
You can save VIDEO PRESET. With preset saved, you can add your video to the EXPORT QUEUE or click EXPORT to start the rendering process immediately. Premiere Pro supports importing video to YouTube directly.
Office 3: How to export MP4 videos in FilmoraPro
FilmoraPro is a new video and audio editing software that's only equally powerful every bit Premiere Pro. If you want to enter a higher video editing level, choose FilmoraPro. Detailed exporting guide is available for you to use. With it, the process of exporting MP4 videos for YouTube is much simpler. Simply follow the steps below:

Footstep one: Click export
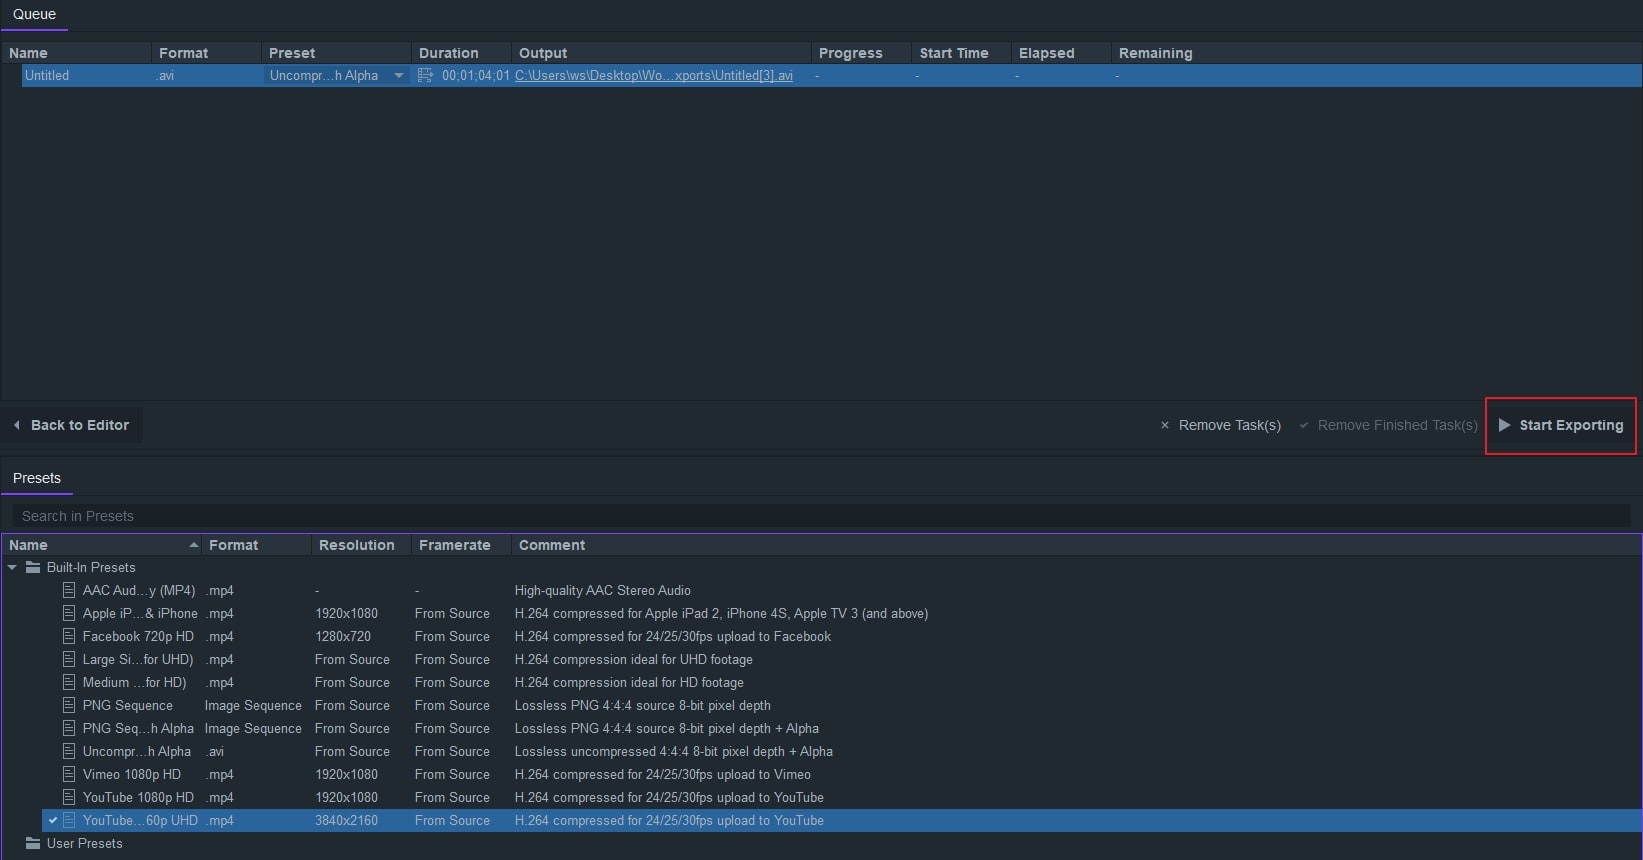
The EXPORT button in FilmoraPro tin be found just above the video timeline. To brainstorm, click EXPORT and select the CONTENTS option to encounter all your active video projects and the current export queue. In the queue, video projects are listed along with important settings similar FORMAT, PRESET and OUTPUT LOCATION. Also, the PRESET PANEL automatically opens in a frame below for each video projection selected.
Step 2: Choose preset
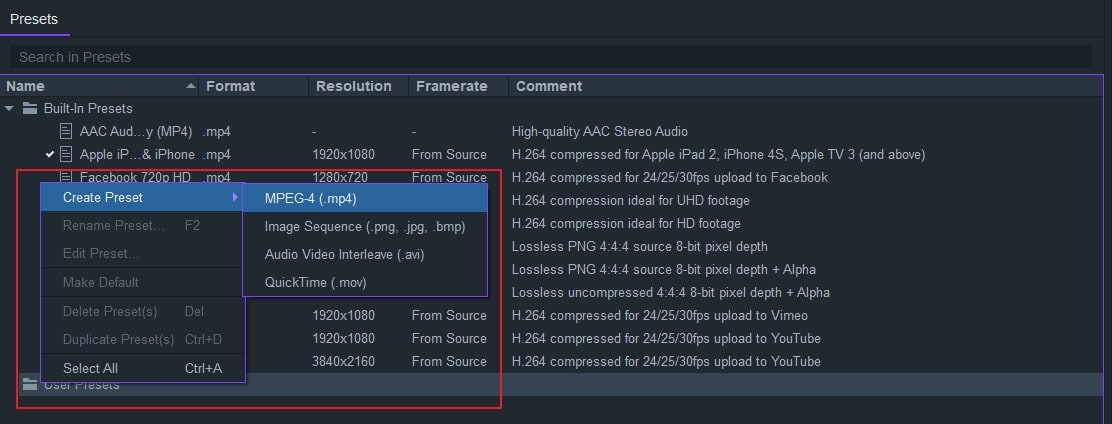
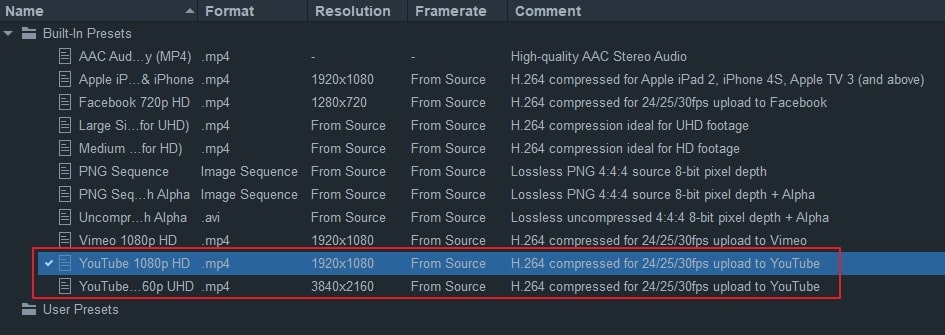
FilmoraPro has two built in YouTube presets. It besides has an selection for USER PRESETS. To create a custom user preset, right-click on USER PRESET and select CREATE PRESET > MPEG-4. A pop-out window volition appear showing all the settings you tin can customize in your new user preset. Name your new preset and nether properties, choose settings for VIDEO and AUDIO
For VIDEO, choose the following settings:
- Codec: H.264
- Dimensions: 1920x1080p (This option is locked past default. Unlock by clicking foursquare box to adjust dimensions)
- Scale Mode: Continue ASPECT RATIO
- Framerate: FROM SOURCE (This is the default setting. To change it, click on the square push and modify accordingly)
- Attribute Ratio: Square PIXELS 1.0
- Profile: HIGH
- Level: set to 4.2 or v.one
- Encoding: VBR 2 PASS (Variable Bitrate and ii passes for amend quality video)
- Under VBR ii Pass, ready TARGET BITRATE to between 8mbps and 16mbps. And so, ready MAX BITRATE to between 16mbps and 40mbps.
To apply your new preset to your video, brand sure your video is selected. Then, observe your new preset listed under USER PRESETS and click the checkbox beside information technology.
Step 3: Consign video to YouTube
To consign your video with your new preset applied, click the Kickoff EXPORTING push button. You can also click the BACK TO EDITOR button to continue editing other projects while export continues in the background.
Determination
These presets become much easier to handle with practice. Professional and experienced video content creators probably take many custom presets saved for their projects. Yet, for beginners and people who want to start using more than advanced video editing software for their projects, the settings higher up are all that'due south needed to produce proficient quality MP4 videos for YouTube.
Source: https://filmora.wondershare.com/adobe-premiere/premiere-pro-export-settings.html
0 Response to "Best Settings to Upload to Youtube Premier Pro Art Video"
Post a Comment